布局
鉴于 Flutter 是一个 UI 工具包,您将花费大量时间使用 Flutter widget 创建布局。在本节中,您将学习如何使用一些最常见的布局 widget 构建布局。您将使用 Flutter DevTools (也称为 Dart DevTools) 来了解 Flutter 如何创建您的布局。最后,您将遇到并调试 Flutter 最常见的布局错误之一,即可怕的“无界约束”错误。
理解 Flutter 中的布局
#Flutter 布局机制的核心是 widget。在 Flutter 中,几乎所有东西都是 widget——甚至布局模型也是 widget。您在 Flutter 应用程序中看到的图像、图标和文本都是 widget。您看不到的东西也是 widget,例如排列、约束和对齐可见 widget 的行、列和网格。
您通过组合 widget 来构建更复杂的 widget 来创建布局。例如,下图显示了 3 个图标,每个图标下方都有一个标签,以及相应的 widget 树。
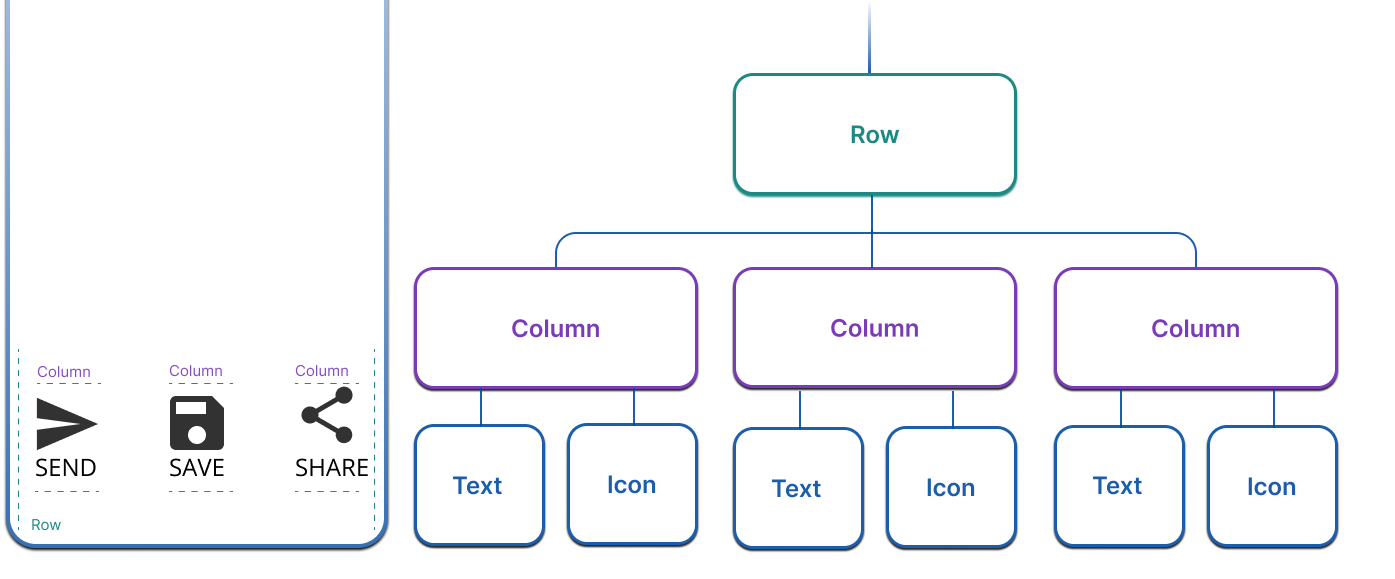
在此示例中,有一行 3 列,每列都包含一个图标和一个标签。所有布局,无论多么复杂,都是通过组合这些布局 widget 创建的。
约束
#理解 Flutter 中的约束是理解 Flutter 中布局如何工作的重要组成部分。
布局,从广义上讲,指的是 widget 的大小及其在屏幕上的位置。任何给定 widget 的大小和位置都受其父级约束;它不能拥有任何它想要的大小,它也不能决定它自己在屏幕上的位置。相反,大小和位置是由 widget 及其父级之间的对话决定的。
在最简单的示例中,布局对话如下所示:
- widget 从其父级接收其约束。
- 约束只是一组 4 个 double 值:最小和最大宽度,以及最小和最大高度。
- widget 在这些约束内确定其应有的大小,并将其宽度和高度传回给父级。
- 父级查看其想要的大小以及应如何对齐,并相应地设置 widget 的位置。对齐可以显式设置,使用各种 widget,如
Center,以及Row和Column上的对齐属性。
在 Flutter 中,这种布局对话通常用简化的短语表达:“约束向下传递。尺寸向上返回。父级设置位置。”
盒子类型
#在 Flutter 中,widget 由其底层 RenderBox 对象渲染。这些对象决定如何处理传递给它们的约束。
通常,有三种盒子:
- 那些尝试尽可能大的。例如,
Center和ListView使用的盒子。 - 那些尝试与其子级相同大小的。例如,
Transform和Opacity使用的盒子。 - 那些尝试特定大小的。例如,
Image和Text使用的盒子。
一些 widget,例如 Container,根据其构造函数参数的不同而类型不同。Container 构造函数默认情况下尝试尽可能大,但如果您给它一个宽度,例如,它会尝试遵循该宽度并成为该特定大小。
其他 widget,例如 Row 和 Column (弹性盒),根据它们获得的约束而不同。在 理解约束文章 中阅读有关弹性盒和约束的更多信息。
布局单个 widget
#要在 Flutter 中布局单个 widget,请将可见 widget (例如 Text 或 Image) 用一个可以更改其在屏幕上位置的 widget (例如 Center widget) 包装起来。
Widget build(BuildContext context) {
  return Center(
    child: BorderedImage(),
  );
}
下图显示了左侧未对齐的 widget 和右侧已居中的 widget。

所有布局 widget 都具有以下任一属性:
- 如果它们接受单个子级,则为
child属性——例如,Center、Container或Padding。 - 如果它们接受 widget 列表,则为
children属性——例如,Row、Column、ListView或Stack。
容器
#Container 是一个便利 widget,它由多个负责布局、绘制、定位和调整大小的 widget 组成。在布局方面,它可用于为 widget 添加内边距和外边距。这里也可以使用 Padding widget 来达到相同的效果。以下示例使用 Container。
Widget build(BuildContext context) {
  return Container(
    padding: EdgeInsets.all(16.0),
    child: BorderedImage(),
  );
}
下图显示了左侧没有内边距的 widget 和右侧带有内边距的 widget。

要在 Flutter 中创建更复杂的布局,您可以组合许多 widget。例如,您可以组合 Container 和 Center。
Widget build(BuildContext context) {
  return Center(
    Container(
      padding: EdgeInsets.all(16.0),
      child: BorderedImage(),
    ),
  );
}
垂直或水平布局多个 widget
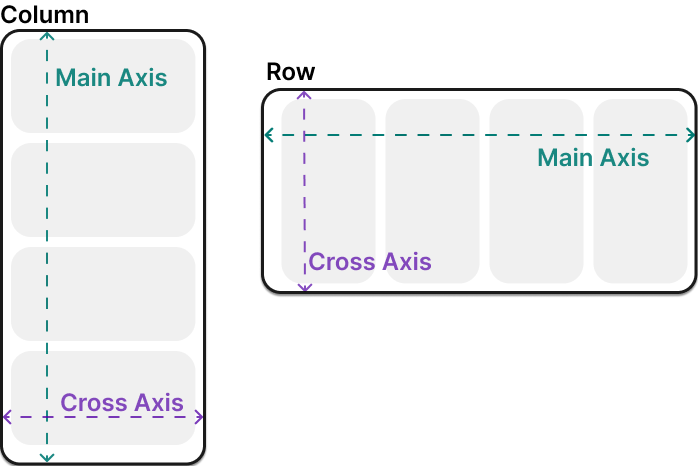
#最常见的布局模式之一是垂直或水平排列 widget。您可以使用 Row widget 水平排列 widget,使用 Column widget 垂直排列 widget。本页上的第一个图表同时使用了两者。
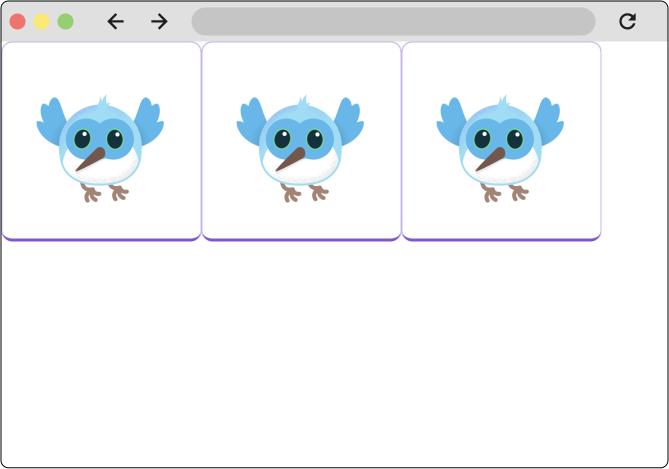
这是使用 Row widget 的最基本示例。
Widget build(BuildContext context) {
  return Row(
    children: [
      BorderedImage(),
      BorderedImage(),
      BorderedImage(),
    ],
  );
}
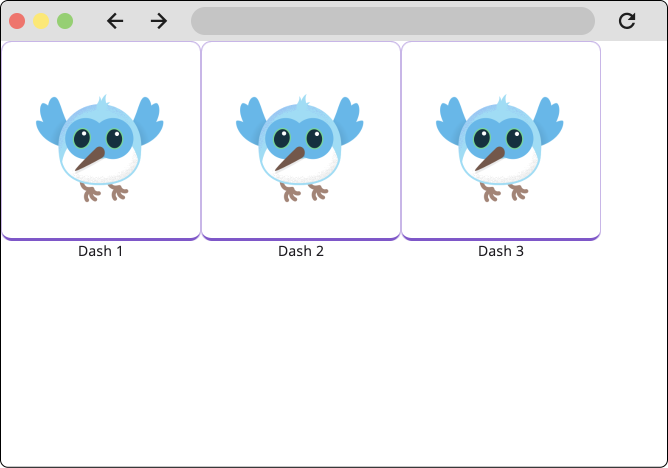
Row 或 Column 的每个子级本身都可以是行和列,组合起来形成复杂的布局。例如,您可以使用列为上述示例中的每个图像添加标签。
Widget build(BuildContext context) {
  return Row(
    children: [
      Column(
        children: [
          BorderedImage(),
          Text('Dash 1'),
        ],
      ),
      Column(
        children: [
          BorderedImage(),
          Text('Dash 2'),
        ],
      ),
      Column(
        children: [
          BorderedImage(),
          Text('Dash 3'),
        ],
      ),
    ],
  );
}
在行和列中对齐 widget
#在以下示例中,每个 widget 宽 200 像素,视口宽 700 像素。因此,widget 从左到右依次对齐,所有额外的空间都在右侧。
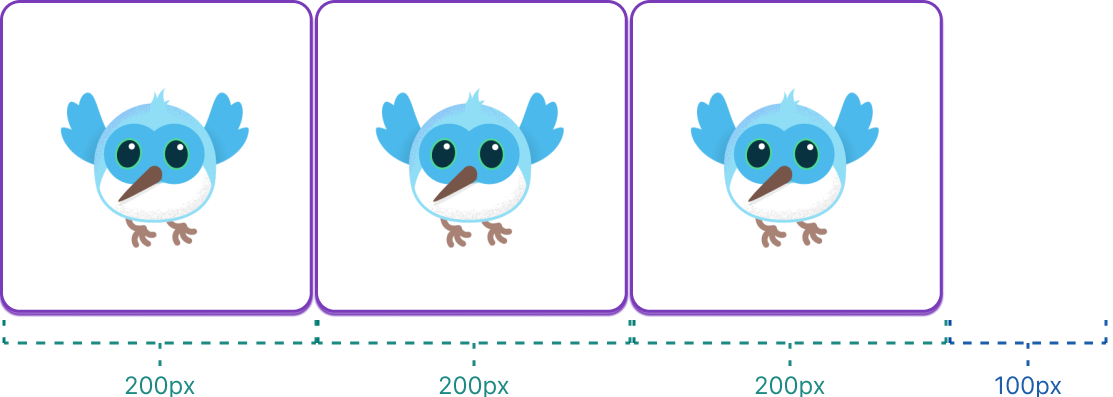
您可以使用 mainAxisAlignment 和 crossAxisAlignment 属性控制行或列如何对其子级进行对齐。对于行,主轴水平运行,交叉轴垂直运行。对于列,主轴垂直运行,交叉轴水平运行。
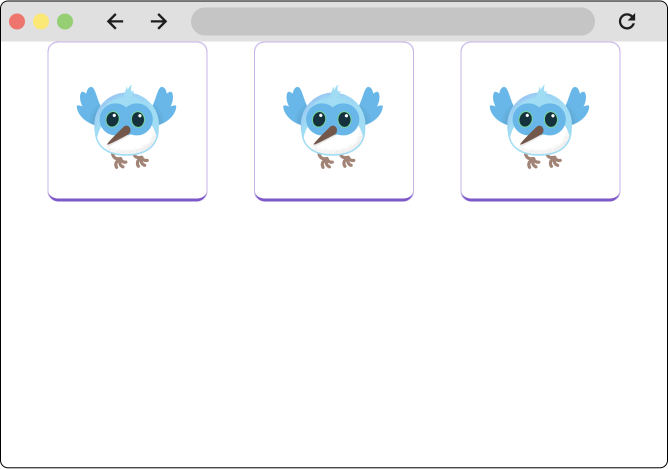
将主轴对齐设置为 spaceEvenly 会在每个图像之间、之前和之后均匀地划分自由水平空间。
Widget build(BuildContext context) {
  return Row(
    mainAxisAlignment: MainAxisAlignment.spaceEvenly,
    children: [
      BorderedImage(),
      BorderedImage(),
      BorderedImage(),
    ],
  );
}
列的工作方式与行相同。以下示例显示了一个由 3 张图像组成的列,每张图像高 100 像素。渲染盒的高度 (在此情况下,是整个屏幕) 大于 300 像素,因此将主轴对齐设置为 spaceEvenly 会在每个图像之间、上方和下方均匀地划分自由垂直空间。
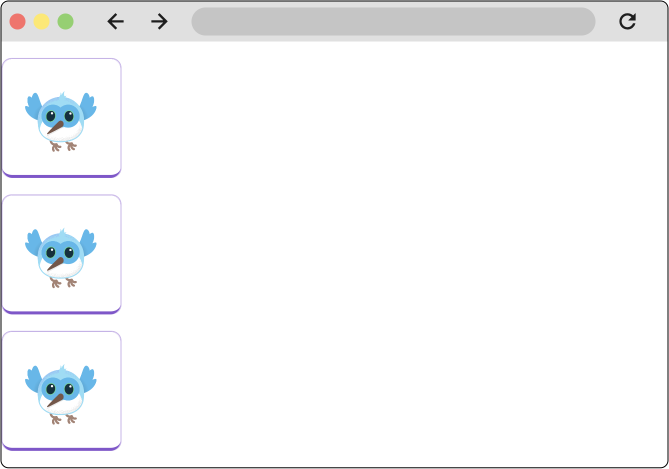
MainAxisAlignment 和 CrossAxisAlignment 枚举提供了各种常量来控制对齐。
Flutter 包含其他可用于对齐的 widget,特别是 Align widget。
在行和列中调整 widget 大小
#当布局太大而无法适应设备时,沿受影响的边缘会出现黄色和黑色条纹图案。在此示例中,视口宽 400 像素,每个子级宽 150 像素。
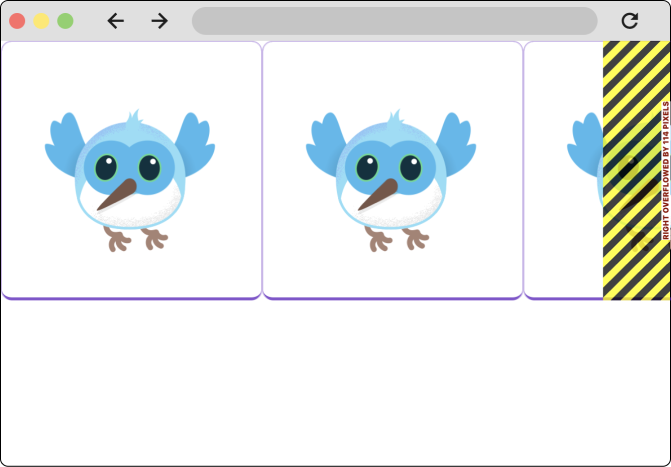
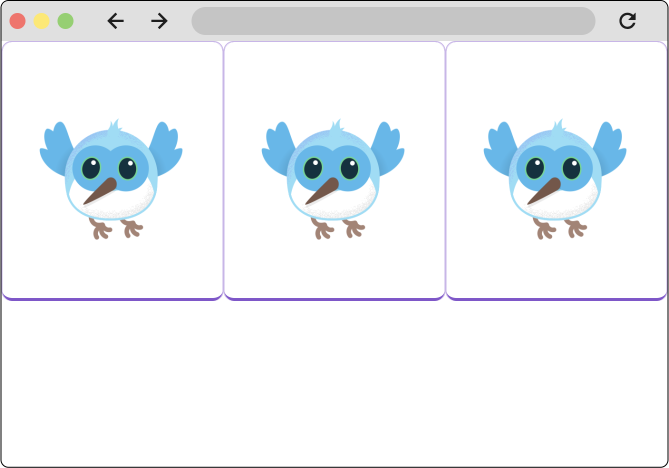
可以使用 Expanded widget 调整 widget 大小以适应行或列。为了修复上一个示例中图像行太宽而超出其渲染盒的问题,请将每个图像用一个 Expanded widget 包装起来。
Widget build(BuildContext context) {
  return const Row(
    children: [
      Expanded(
        child: BorderedImage(width: 150, height: 150),
      ),
      Expanded(
        child: BorderedImage(width: 150, height: 150),
      ),
      Expanded(
        child: BorderedImage(width: 150, height: 150),
      ),
    ],
  );
}
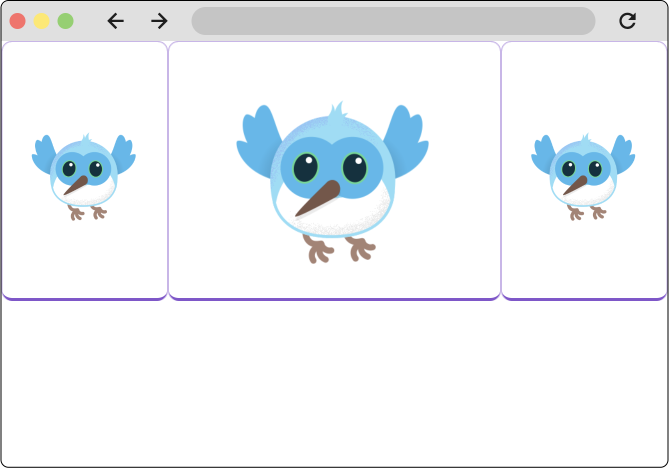
Expanded widget 还可以指定 widget 相对于其兄弟 widget 应占用多少空间。例如,您可能希望一个 widget 占用其兄弟 widget 两倍的空间。为此,请使用 Expanded widget 的 flex 属性,这是一个整数,用于确定 widget 的 flex 因子。默认的 flex 因子为 1。以下代码将中间图像的 flex 因子设置为 2。
Widget build(BuildContext context) {
  return const Row(
    children: [
      Expanded(
        child: BorderedImage(width: 150, height: 150),
      ),
      Expanded(
        flex: 2,
        child: BorderedImage(width: 150, height: 150),
      ),
      Expanded(
        child: BorderedImage(width: 150, height: 150),
      ),
    ],
  );
}
DevTools 和调试布局
#在某些情况下,盒子的约束是无界的,或者说是无限的。这意味着最大宽度或最大高度设置为 double.infinity。当给定无界约束时,尝试尽可能大的盒子将无法正常工作,并且在调试模式下会抛出异常。
渲染盒最终出现无界约束最常见的情况是在弹性盒 (Row 或 Column) 内,以及在可滚动区域 (例如 ListView 和其他 ScrollView 子类) 内。例如,ListView 尝试在其交叉方向上扩展以适应可用空间 (也许它是一个垂直滚动的块,并尝试与其父级一样宽)。如果您将一个垂直滚动的 ListView 嵌套在一个水平滚动的 ListView 内,则内部列表尝试尽可能宽,这将是无限宽,因为外部列表在该方向上是可滚动的。
也许您在构建 Flutter 应用程序时会遇到的最常见错误是由于不正确地使用布局 widget 造成的,这被称为“无界约束”错误。
如果您第一次开始构建 Flutter 应用程序时,只有一种类型错误需要准备好面对,那就是这种错误。
在新标签页中观看 YouTube 视频:“Decoding Flutter: Unbounded height and width”
可滚动 widget
#Flutter 具有许多内置的自动滚动 widget,还提供了各种可以自定义以创建特定滚动行为的 widget。在本页中,您将看到如何使用最常见的 widget 使任何页面可滚动,以及一个用于创建可滚动列表的 widget。
ListView
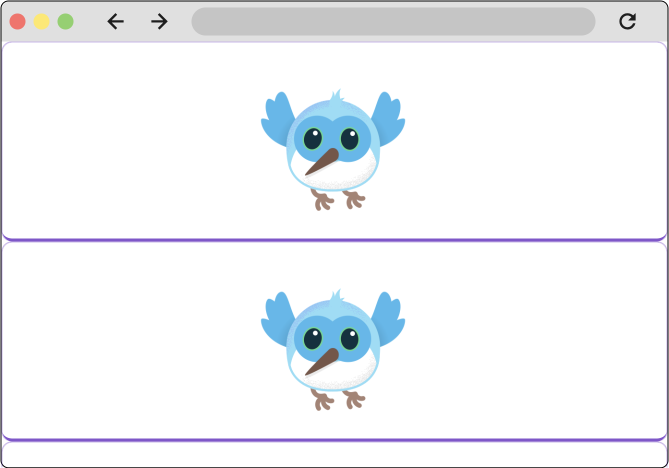
#ListView 是一个类似列的 widget,当其内容长于其渲染盒时,它会自动提供滚动。使用 ListView 的最基本方法与使用 Column 或 Row 非常相似。与列或行不同,ListView 要求其子级占用交叉轴上的所有可用空间,如下例所示。
Widget build(BuildContext context) {
  return ListView(
    children: const [
      BorderedImage(),
      BorderedImage(),
      BorderedImage(),
    ],
  );
}
当您有未知或非常大 (或无限) 数量的列表项时,通常使用 ListView。在这种情况下,最好使用 ListView.builder 构造函数。构建器构造函数只构建当前屏幕上可见的子级。
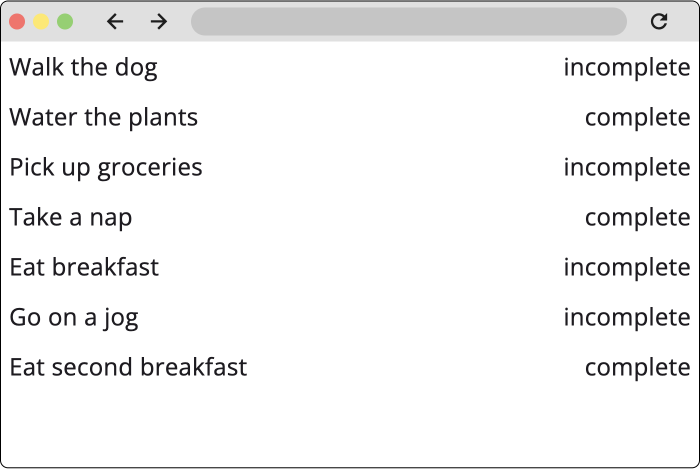
在以下示例中,ListView 显示了一系列待办事项。待办事项正在从存储库中获取,因此待办事项的数量是未知的。
final List<ToDo> items = Repository.fetchTodos();

Widget build(BuildContext context) {
  return ListView.builder(
    itemCount: items.length,
    itemBuilder: (context, idx) {
      var item = items[idx];
      return Padding(
        padding: const EdgeInsets.all(8.0),
        child: Row(
          mainAxisAlignment: MainAxisAlignment.spaceBetween,
          children: [
            Text(item.description),
            Text(item.isComplete),
          ],
        ),
      );
    },
  );
}
自适应布局
#由于 Flutter 用于创建移动、平板电脑、桌面和 Web 应用程序,您可能需要根据屏幕尺寸或输入设备等因素调整应用程序以使其行为不同。这被称为使应用程序具有“自适应性”和“响应性”。
在创建自适应布局中最有用的 widget 之一是 LayoutBuilder widget。LayoutBuilder 是 Flutter 中使用“构建器”模式的众多 widget 之一。
构建器模式
#在 Flutter 中,您会发现一些 widget 的名称或构造函数中包含“builder”一词。以下列表并不详尽:
这些不同的“构建器”对于解决不同的问题很有用。例如,ListView.builder 构造函数主要用于懒惰地渲染列表中的项目,而 Builder widget 对于在深度 widget 代码中访问 BuildContext 很有用。
尽管它们的使用场景不同,但这些构建器的工作方式是统一的。构建器 widget 和构建器构造函数都具有名为“builder”(或类似名称,例如 ListView.builder 中的 itemBuilder)的参数,并且 builder 参数始终接受回调。此回调是一个构建器函数。构建器函数是向父 widget 传递数据的回调,父 widget 使用这些参数来构建并返回子 widget。构建器函数总是至少传入一个参数——构建上下文——并且通常至少传入另一个参数。
例如,LayoutBuilder widget 用于根据视口的大小创建响应式布局。构建器回调主体会传递其从父级接收到的 BoxConstraints,以及 widget 的“BuildContext”。通过这些约束,您可以根据可用空间返回不同的 widget。
在新标签页中观看 YouTube 视频:“LayoutBuilder (Flutter Widget of the Week)”
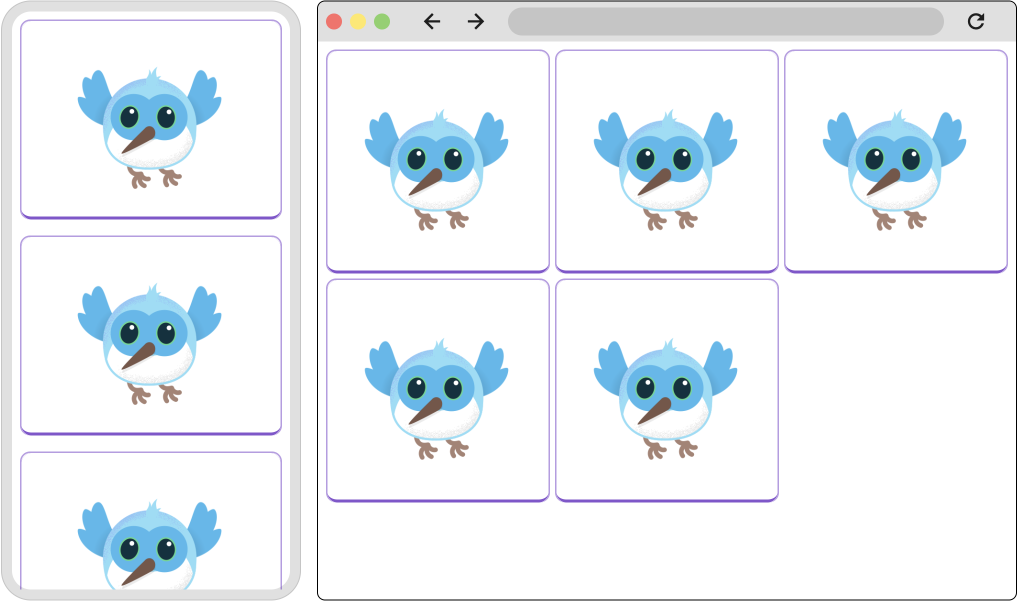
在以下示例中,LayoutBuilder 返回的 widget 会根据视口是否小于或等于 600 像素,或大于 600 像素而变化。
Widget build(BuildContext context) {
  return LayoutBuilder(
    builder: (BuildContext context, BoxConstraints constraints) {
      if (constraints.maxWidth <= 600) {
        return _MobileLayout();
      } else {
        return _DesktopLayout();
      }
    },
  );
}
同时,ListView.builder 构造函数上的 itemBuilder 回调会传入构建上下文和一个 int。此回调会为列表中的每个项目调用一次,并且 int 参数表示列表项的索引。当 Flutter 构建 UI 时,第一次调用 itemBuilder 回调时,传入函数的 int 为 0,第二次为 1,依此类推。
这允许您根据索引提供特定的配置。回顾上面使用 ListView.builder 构造函数的示例:
final List<ToDo> items = Repository.fetchTodos();

Widget build(BuildContext context) {
  return ListView.builder(
    itemCount: items.length,
    itemBuilder: (context, idx) {
      var item = items[idx];
      return Padding(
        padding: const EdgeInsets.all(8.0),
        child: Row(
          mainAxisAlignment: MainAxisAlignment.spaceBetween,
          children: [
            Text(item.description),
            Text(item.isComplete),
          ],
        ),
      );
    },
  );
}
此示例代码使用传入构建器的索引从项目列表中获取正确的待办事项,然后将在构建器中返回的 widget 中显示该待办事项的数据。
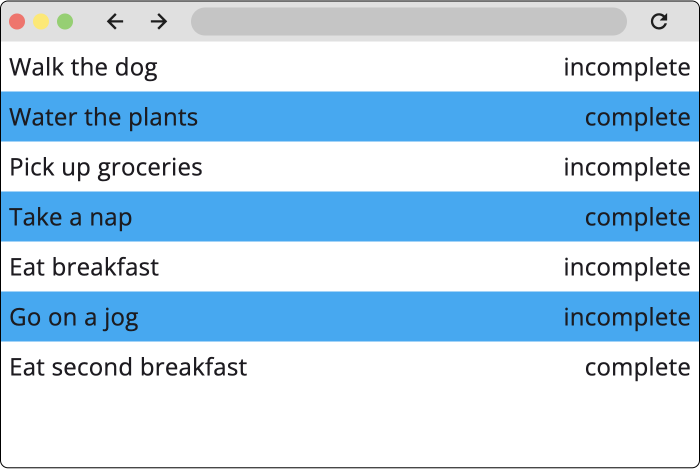
为了说明这一点,以下示例更改了每隔一个列表项的背景颜色。
final List<ToDo> items = Repository.fetchTodos();

Widget build(BuildContext context) {
  return ListView.builder(
    itemCount: items.length,
    itemBuilder: (context, idx) {
      var item = items[idx];
      return Container(
        color: idx % 2 == 0 ? Colors.lightBlue : Colors.transparent,
        padding: const EdgeInsets.all(8.0),
        child: Row(
          mainAxisAlignment: MainAxisAlignment.spaceBetween,
          children: [
            Text(item.description),
            Text(item.isComplete),
          ],
        ),
      );
    },
  );
}
额外资源
#- 常用布局 widget 和概念
- 调整 widget 大小和定位
- 可滚动 widget
- 示例代码:处理长列表
- 示例代码:创建水平列表
- 示例代码:创建网格列表
- 视频:ListView—Flutter 本周 Widget
- 自适应应用程序
API 参考
#以下资源解释了各个 API。
反馈
#由于本网站的此部分正在不断发展,我们欢迎您的反馈!