淡入淡出组件
UI 开发者经常需要在屏幕上显示和隐藏元素。然而,快速地在屏幕上弹出和消失元素可能会让最终用户感到不适。相反,使用不透明度动画使元素淡入淡出,以创建流畅的体验。
AnimatedOpacity 小部件可以轻松执行不透明度动画。本教程采用以下步骤:
- 创建一个用于淡入淡出的盒子。
- 定义一个
StatefulWidget。 - 显示一个切换可见性的按钮。
- 使盒子淡入淡出。
1. 创建一个用于淡入淡出的盒子
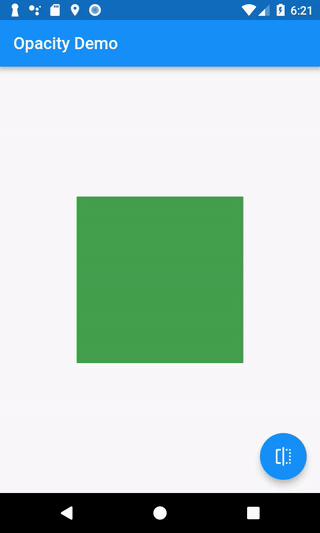
#首先,创建一些用于淡入淡出的东西。在这个例子中,在屏幕上绘制一个绿色的盒子。
Container(width: 200, height: 200, color: Colors.green)2. 定义一个 StatefulWidget
#现在你有一个绿色的盒子可以动画,你需要一种方法来知道盒子是否应该可见。为此,请使用 StatefulWidget。
StatefulWidget 是一个创建 State 类的类。State 对象保存着关于应用程序的一些数据,并提供了一种更新该数据的方法。更新数据时,你还可以要求 Flutter 使用这些更改来重建 UI。
在这种情况下,你有一条数据:一个布尔值,表示按钮是否可见。
要构建 StatefulWidget,请创建两个类:一个 StatefulWidget 和一个相应的 State 类。提示:Android Studio 和 VSCode 的 Flutter 插件包含 stful 片段,可快速生成此代码。
// The StatefulWidget's job is to take data and create a State class.
// In this case, the widget takes a title, and creates a _MyHomePageState.
class MyHomePage extends StatefulWidget {
  final String title;

  const MyHomePage({super.key, required this.title});

  @override
  State<MyHomePage> createState() => _MyHomePageState();
}

// The State class is responsible for two things: holding some data you can
// update and building the UI using that data.
class _MyHomePageState extends State<MyHomePage> {
  // Whether the green box should be visible.
  bool _visible = true;

  @override
  Widget build(BuildContext context) {
    // The green box goes here with some other Widgets.
  }
}
3. 显示一个切换可见性的按钮
#现在你有一些数据来确定绿色的盒子是否应该可见,你需要一种方法来更新这些数据。在这个例子中,如果盒子可见,则隐藏它。如果盒子隐藏,则显示它。
为了处理这个问题,显示一个按钮。当用户按下按钮时,将布尔值从 true 切换到 false,或从 false 切换到 true。使用 setState() 进行此更改,它是 State 类的一个方法。这会告诉 Flutter 重建小部件。
有关处理用户输入的更多信息,请参阅指南的手势部分。
FloatingActionButton(
  onPressed: () {
    // Call setState. This tells Flutter to rebuild the
    // UI with the changes.
    setState(() {
      _visible = !_visible;
    });
  },
  tooltip: 'Toggle Opacity',
  child: const Icon(Icons.flip),
)
4. 使盒子淡入淡出
#你的屏幕上有一个绿色的盒子,还有一个按钮可以切换可见性为 true 或 false。如何让盒子淡入淡出?使用 AnimatedOpacity 小部件。
AnimatedOpacity 小部件需要三个参数:
opacity:一个从 0.0(不可见)到 1.0(完全可见)的值。duration:动画完成所需的时间。child:要动画的小部件。在本例中,是绿色的盒子。
AnimatedOpacity(
  // If the widget is visible, animate to 0.0 (invisible).
  // If the widget is hidden, animate to 1.0 (fully visible).
  opacity: _visible ? 1.0 : 0.0,
  duration: const Duration(milliseconds: 500),
  // The green box must be a child of the AnimatedOpacity widget.
  child: Container(width: 200, height: 200, color: Colors.green),
)
互动示例
#import 'package:flutter/material.dart';
void main() => runApp(const MyApp());
class MyApp extends StatelessWidget {
const MyApp({super.key});
@override
Widget build(BuildContext context) {
const appTitle = 'Opacity Demo';
return const MaterialApp(
title: appTitle,
home: MyHomePage(title: appTitle),
);
}
}
// The StatefulWidget's job is to take data and create a State class.
// In this case, the widget takes a title, and creates a _MyHomePageState.
class MyHomePage extends StatefulWidget {
const MyHomePage({super.key, required this.title});
final String title;
@override
State<MyHomePage> createState() => _MyHomePageState();
}
// The State class is responsible for two things: holding some data you can
// update and building the UI using that data.
class _MyHomePageState extends State<MyHomePage> {
// Whether the green box should be visible
bool _visible = true;
@override
Widget build(BuildContext context) {
return Scaffold(
appBar: AppBar(title: Text(widget.title)),
body: Center(
child: AnimatedOpacity(
// If the widget is visible, animate to 0.0 (invisible).
// If the widget is hidden, animate to 1.0 (fully visible).
opacity: _visible ? 1.0 : 0.0,
duration: const Duration(milliseconds: 500),
// The green box must be a child of the AnimatedOpacity widget.
child: Container(width: 200, height: 200, color: Colors.green),
),
),
floatingActionButton: FloatingActionButton(
onPressed: () {
// Call setState. This tells Flutter to rebuild the
// UI with the changes.
setState(() {
_visible = !_visible;
});
},
tooltip: 'Toggle Opacity',
child: const Icon(Icons.flip),
),
);
}
}